How to Deploy a Flask App Using Azure CLI for Free (Using a Student Account)
As part of a personal project, I built a small Flask app that fetches weather data using the OpenWeather API. Since my school gives me access to Azure for Students, I figured it would be a great opportunity to learn how to deploy a Python web app to Azure App Service.
What followed was a journey filled with learning curves, command-line fixes, and valuable lessons that I hope will help others avoid the same pitfalls.
In this guide, I’ll walk you through every step I took and every problem I solved to get my weather app live on the internet.
Prerequisites
Before diving in, make sure you have the following ready:
- A working Flask app (feel free to use my weather app)
- Azure CLI installed
- Git installed and configured
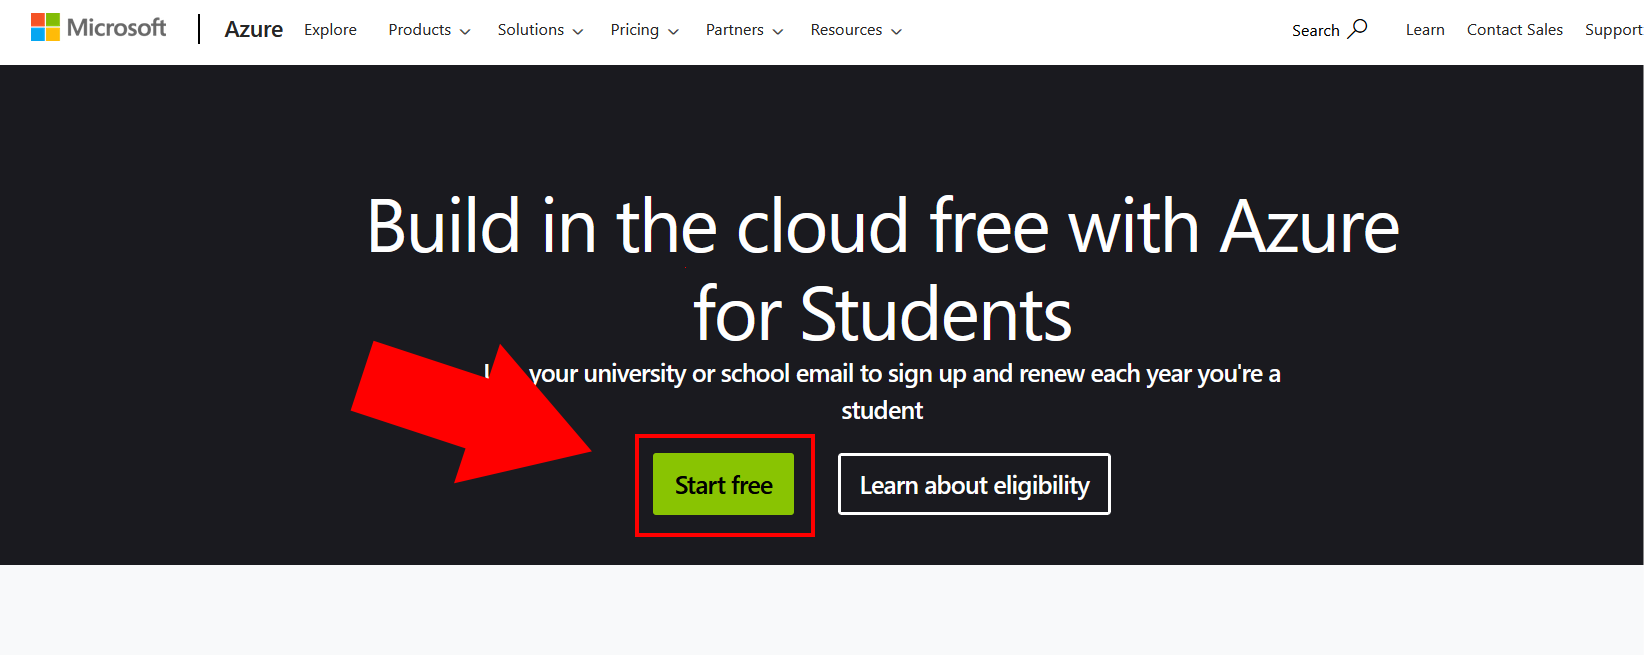
- An Azure for Students subscription (free with a school email)
Step 1: Prepare Your Flask App for Deployment
My app had the following structure:
1
2
3
4
5
6
weather-app/
├── app.py
├── requirements.txt
├── .env                # Contains my API key (gitignored)
└── templates/
    └── index.html
I made sure of the following:
- My main file was named
app.py, with the Flask instance defined asapp = Flask(__name__) - I installed
gunicorn, which Azure uses to serve Python apps:
1
2
pip install gunicorn
pip freeze > requirements.txt
- I excluded
.envfrom version control using.gitignore
This prepared the app for production deployment.
Step 2: Create Azure Resources via CLI
With the Azure CLI, I created the necessary resources: a resource group, an App Service Plan, and a Web App.
1
az login
1
az group create --name flask-resource-group --location eastus
1
az appservice plan create --name flask-plan --resource-group flask-resource-group --sku FREE --is-linux
1
az webapp create --resource-group flask-resource-group --plan flask-plan --name flask-weather-app --runtime "PYTHON|3.10" --deployment-local-git --os-type Linux
🛑 Error: “MissingSubscriptionRegistration”
One of the first errors I encountered was:
1
(MissingSubscriptionRegistration) The subscription is not registered to use namespace 'Microsoft.Web'
This stopped everything until I registered the resource provider manually:
1
az provider register --namespace Microsoft.Web
This took a couple of minutes to go through, but it fixed the problem.
Step 3: Enable Git-Based Deployment
Azure generated a Git URL that I could push my code to. If you forget it, you can fetch it again with:
1
2
3
4
az webapp deployment source config-local-git \
  --name flask-weather-app \
  --resource-group flask-resource-group \
  --query url --output tsv
Issue I hit: The default Git username Azure generated was something like $flask-weather-app, which I didn’t want.
Fix: Set a custom deployment user:
1
az webapp deployment user set --user-name araza --password 'MySuperSecurePassword123!'
This updated the Git URL to:
1
https://araza@flask-weather-app.scm.azurewebsites.net/flask-weather-app.git
Step 4: Push the Flask App to Azure
My app code was on a branch called main, but Azure expects the code to land on master.
1
git remote add azure https://araza@flask-weather-app.scm.azurewebsites.net/flask-weather-app.git
1
git push azure main:master
When prompted, I entered the password I had set in the previous step.
Step 5: Configure the Startup Command
Azure needs to know how to run your app. I configured it to use Gunicorn with this command:
1
2
3
4
az webapp config set \
  --resource-group flask-resource-group \
  --name flask-weather-app \
  --startup-file "gunicorn app:app"
If your entry file is
main.pywithapp = Flask(__name__), usegunicorn main:app
Step 6: Handling Environment Variables (No .env File!)
Since my .env file was ignored in Git (as it should be), my deployed app initially broke because it couldn’t access the API key.
Fix: Use Azure’s environment settings to securely inject the key:
1
2
3
4
az webapp config appsettings set \
  --name flask-weather-app \
  --resource-group flask-resource-group \
  --settings WEATHER_API_KEY=my_real_key
My Flask app accessed it like this:
1
2
import os
api_key = os.environ.get("WEATHER_API_KEY")
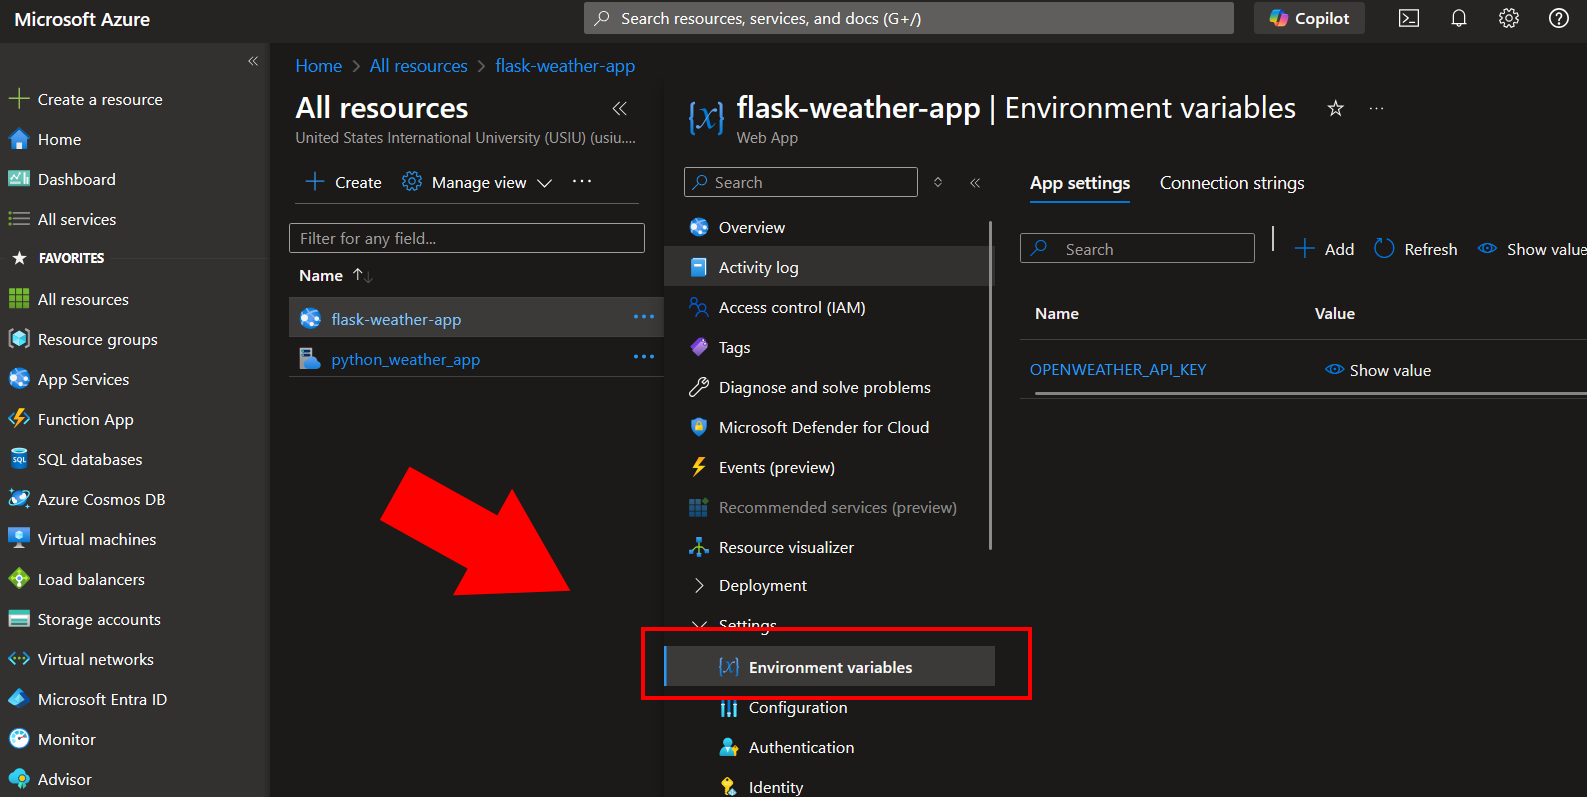
Alternatively, you can add the key in the Azure dashboard under Settings > Environment variables:
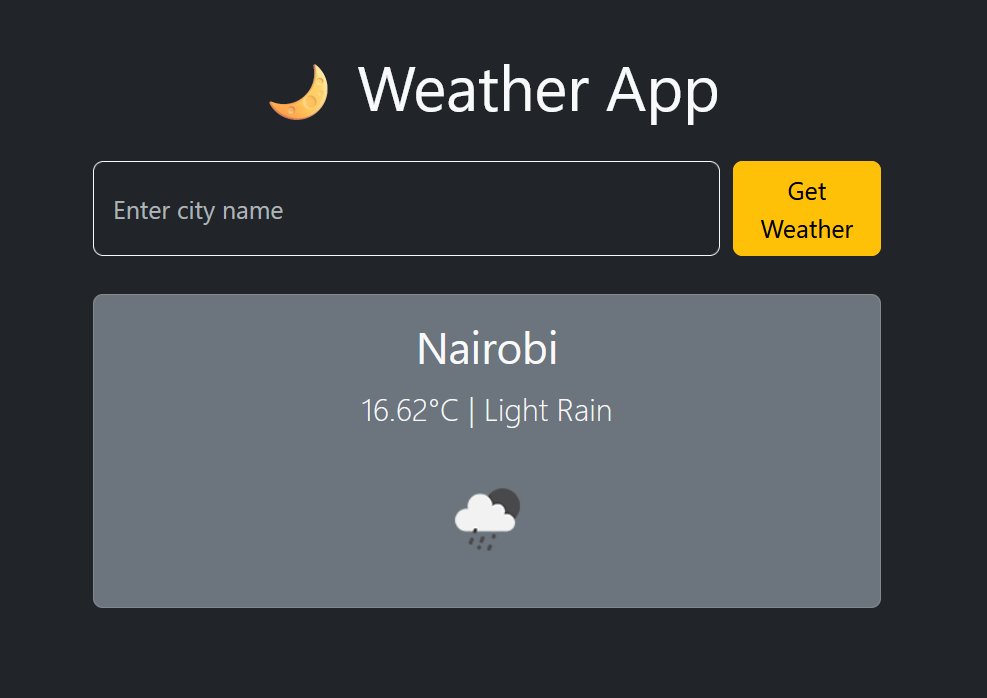
Final Result
With everything in place, I was able to visit my live site:
1
https://flask-weather-app.azurewebsites.net
The weather data loaded, my styling worked, and the API connection succeeded — all running in the cloud on a student budget of $0/month!
Lessons Learned
Deploying to Azure taught me a lot more than just pushing code:
- Azure’s CLI is powerful but has a learning curve, especially for student setups
- The difference between Windows and Linux plans matters
- Setting up environment variables securely is essential
- Deployment credentials and branch targeting (
main:master) need attention
This process took some trial and error, but I now have a working deployment pipeline and a better understanding of cloud platforms.
If you’re a student with access to Azure, this is a great way to get real cloud experience. I hope this walkthrough helps you get your app online faster than I did!
Have questions? Let me know!