How to Claim Your Free .tech Domain with GitHub Student Developer Pack

If you’re a student and love to tinker with projects, GitHub has a treat for you: a free .tech domain for one year! This is part of the GitHub Student Developer Pack, which includes tons of perks for student developers.
In this post, I’ll walk you through how to claim your domain, set up DNS records, and verify it in GitHub Pages so you can have a professional-looking site (like this one!) with a custom domain.
Step 1: Claim Your Free .tech Domain
First, you need to gain access to the GitHub Student Developer Pack. Follow these steps:
- Visit the GitHub Student Developer Pack page.
- Sign in with your GitHub account and complete the verification process.
- GitHub will review your application, which can take a few hours.
- Once approved, navigate to Get.tech’s GitHub Student offer.

- Click the offer link to be taken to Get.tech.
- Enter your desired
.techdomain.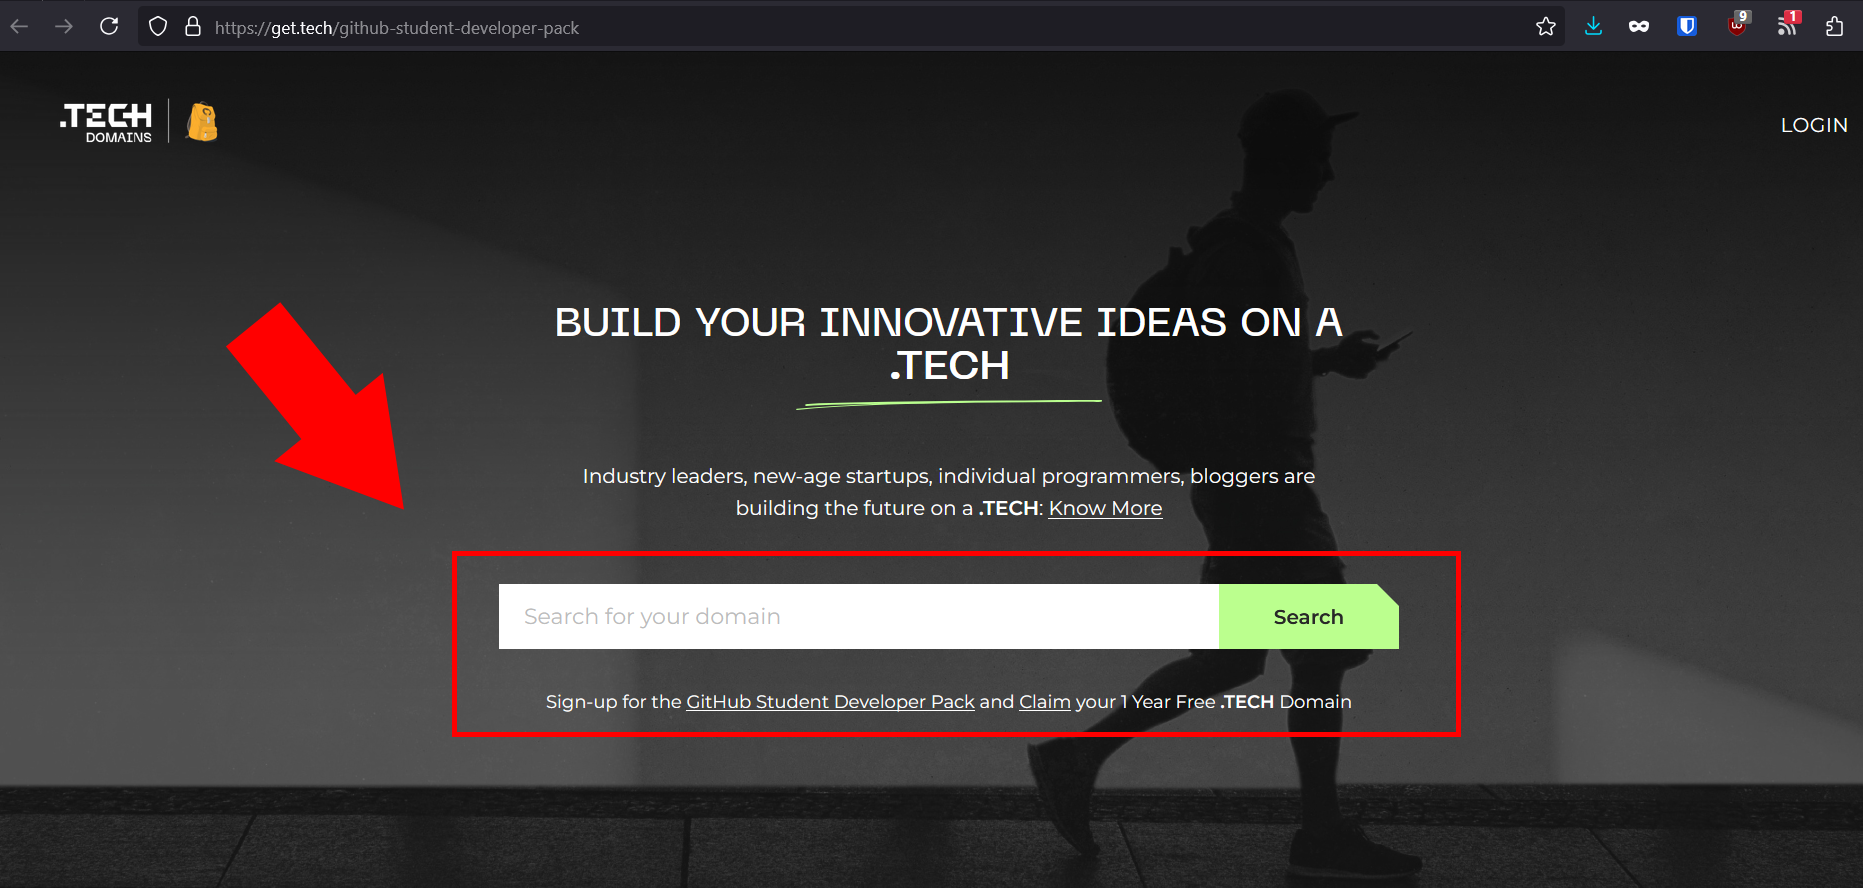
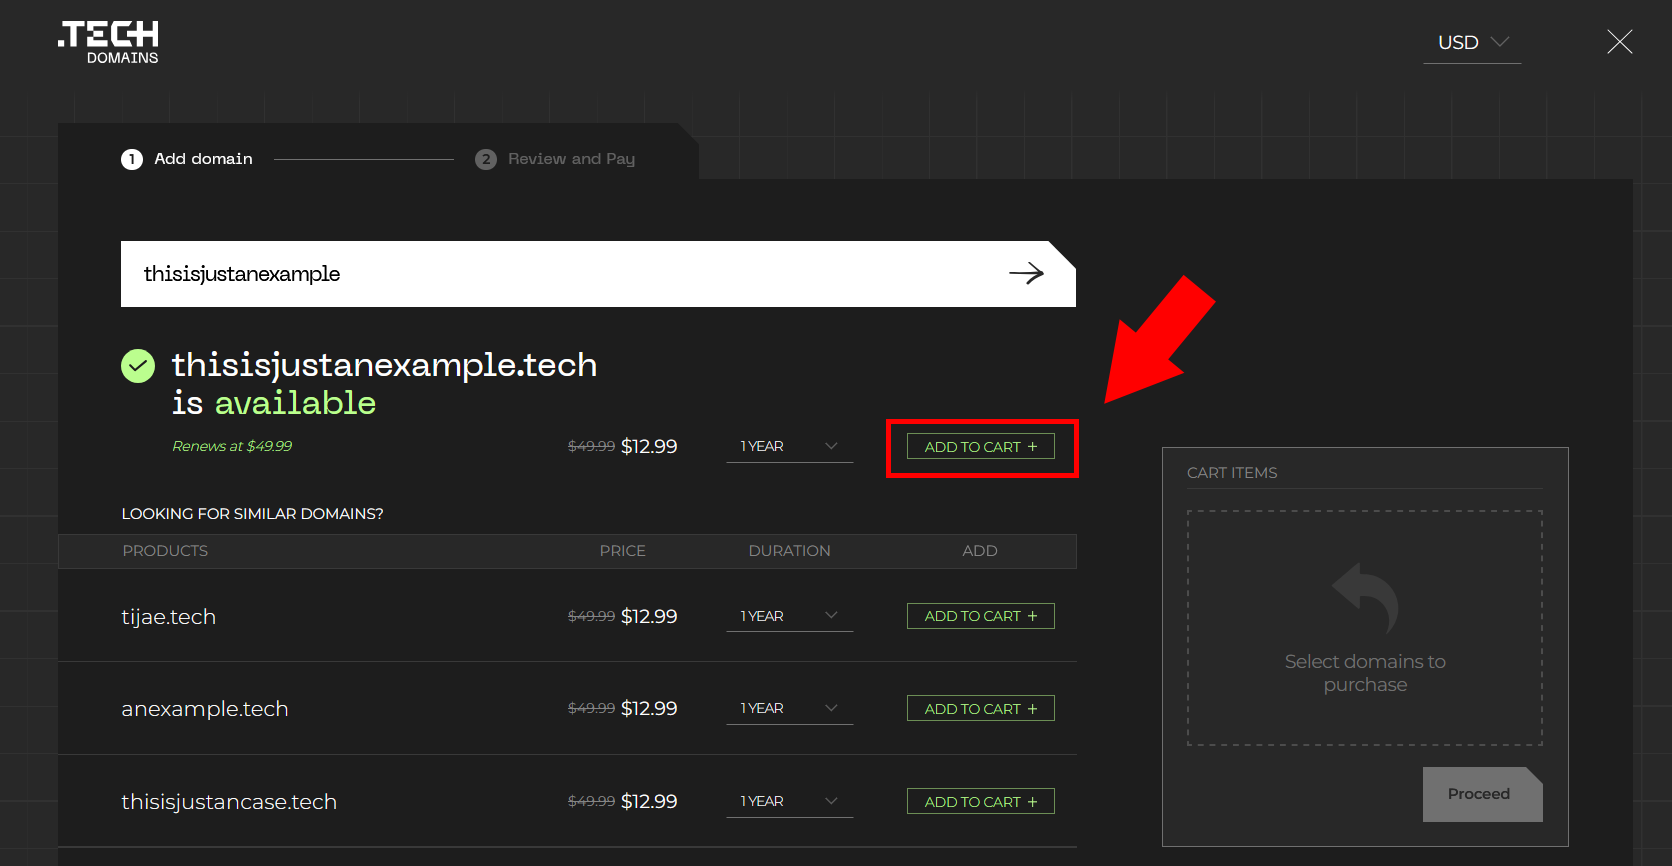
- The system will check if the domain is available and suggest alternatives if it isn’t.
- If your domain is available, add it to your cart.
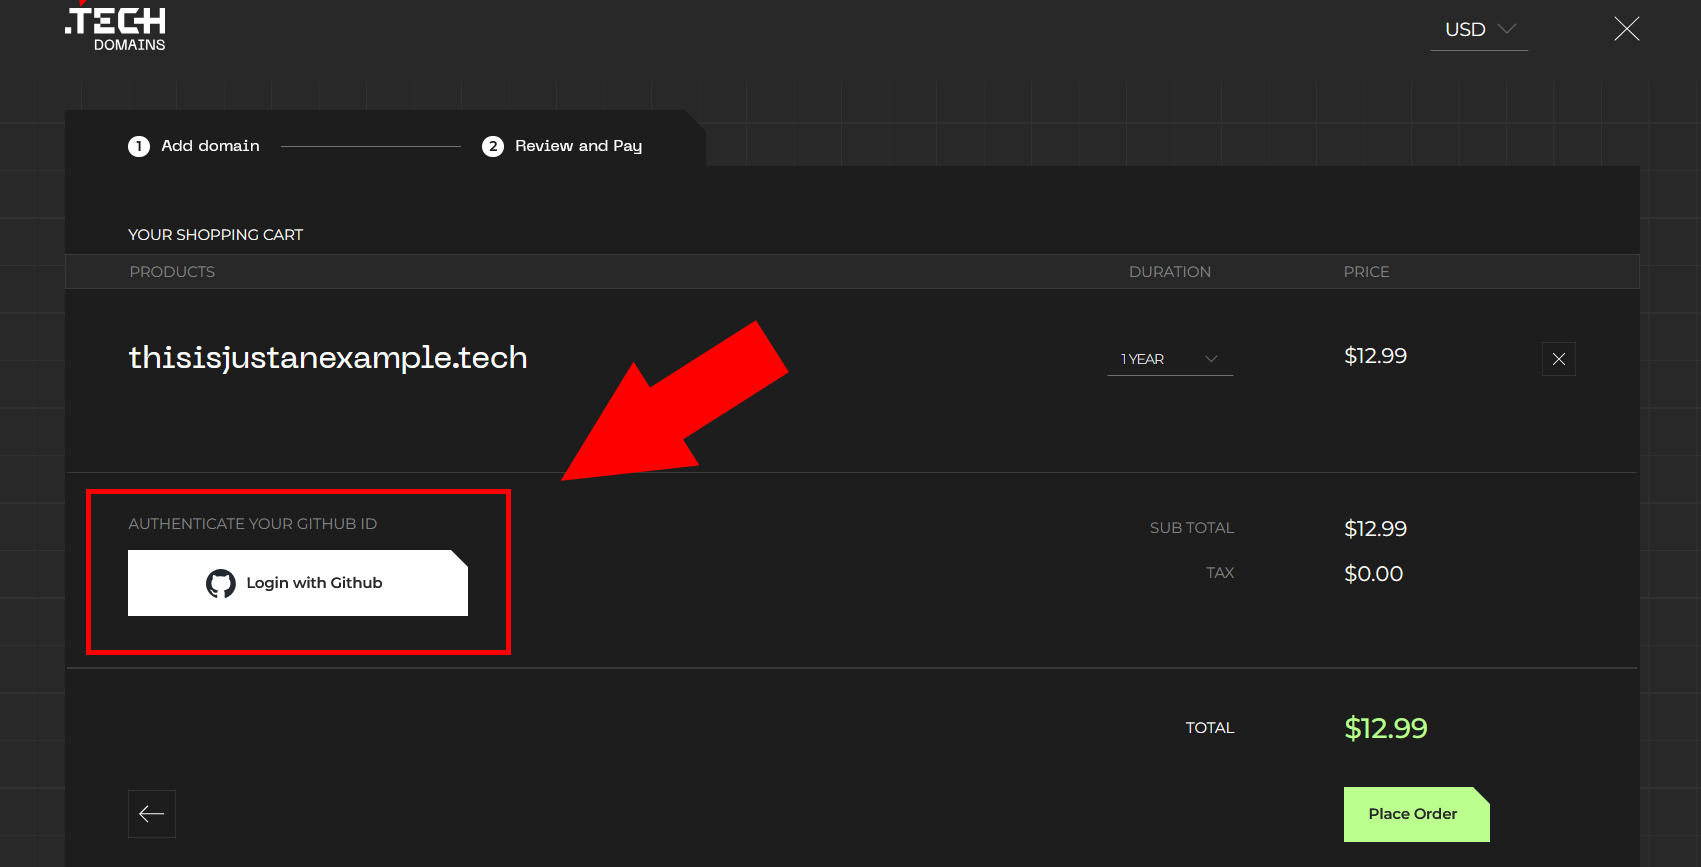
- Proceed to checkout, where you’ll log in with your GitHub account to claim the free .tech domain for one year.
Important Note:
After the first year, you’ll need to renew your domain at a whopping $49.99 per year if you want to keep using it. For that much money, you could easily register a .com, .net, .org, .xyz, or similar domain for a whole five years! Take a look at what options are available on Namecheap or Cloudflare. The good news is that Get.tech does not require you to add a payment method before claiming your free domain, so you don’t have to worry about getting automatically charged $49.99.
Step 2: Accessing the .tech Control Panel
Now that you have your domain, it’s time to configure it. Since Get.tech provides the domain, you’ll manage DNS settings in their control panel:
- Log in to Get.tech.
- Use the Jump to Domain field to find your domain.

- Click DNS Management, then Manage DNS. A new window will open where you can manage records.
- Here, you can add A records, AAAA records, and TXT records.
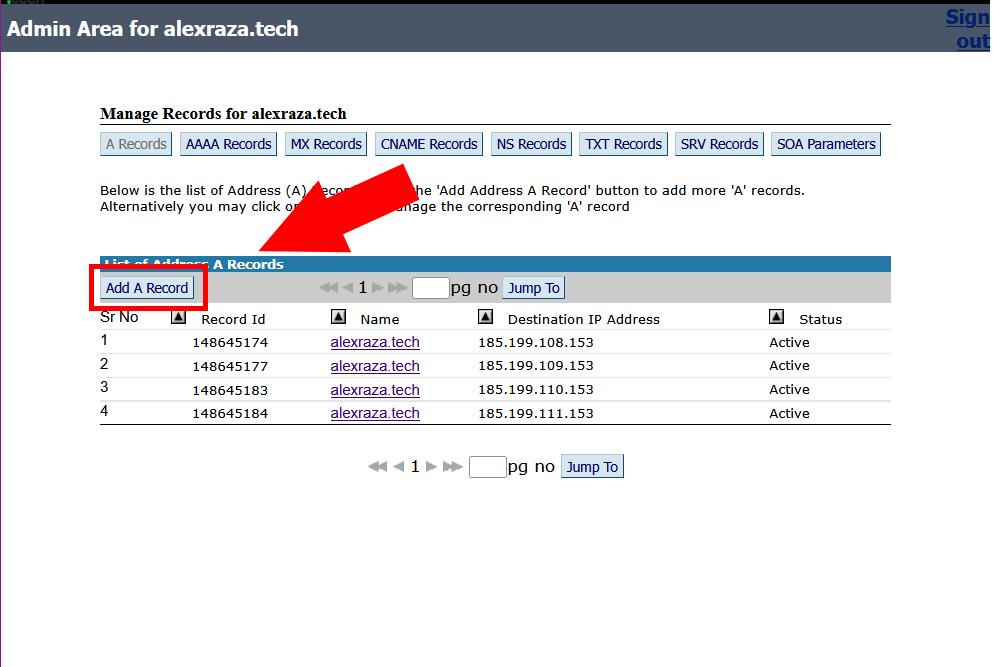
- GitHub Pages requires A records (for IPv4) and AAAA records (for IPv6) to point your domain to GitHub’s servers. You have to add them in one by one. The required records can be found in GitHub’s documentation.
Step 3: Add Your Custom Domain in GitHub Pages
Now that you’ve set up your A and AAAA records, the next step is to tell GitHub Pages about your custom domain.
- Go to your GitHub repository.
- Navigate to Settings > Pages.
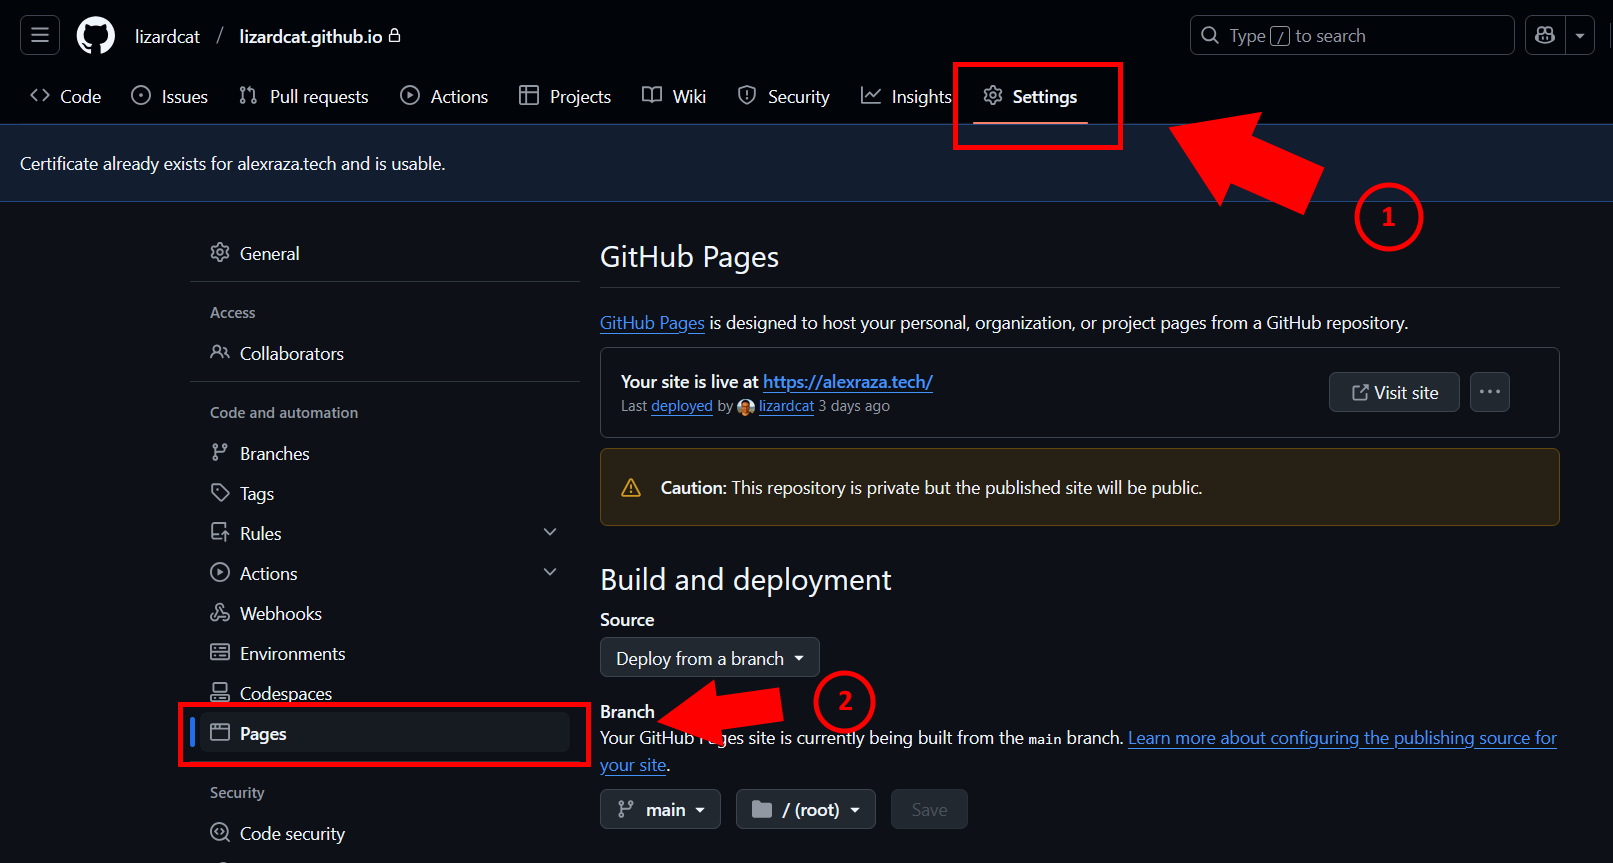
- Scroll down to the Custom Domain section.
- Enter your domain (e.g.,
yourdomain.tech). - Click Save. GitHub will perform a DNS check to confirm everything is set up correctly.
- Don’t forget to check the Enforce HTTPS option to secure your website!
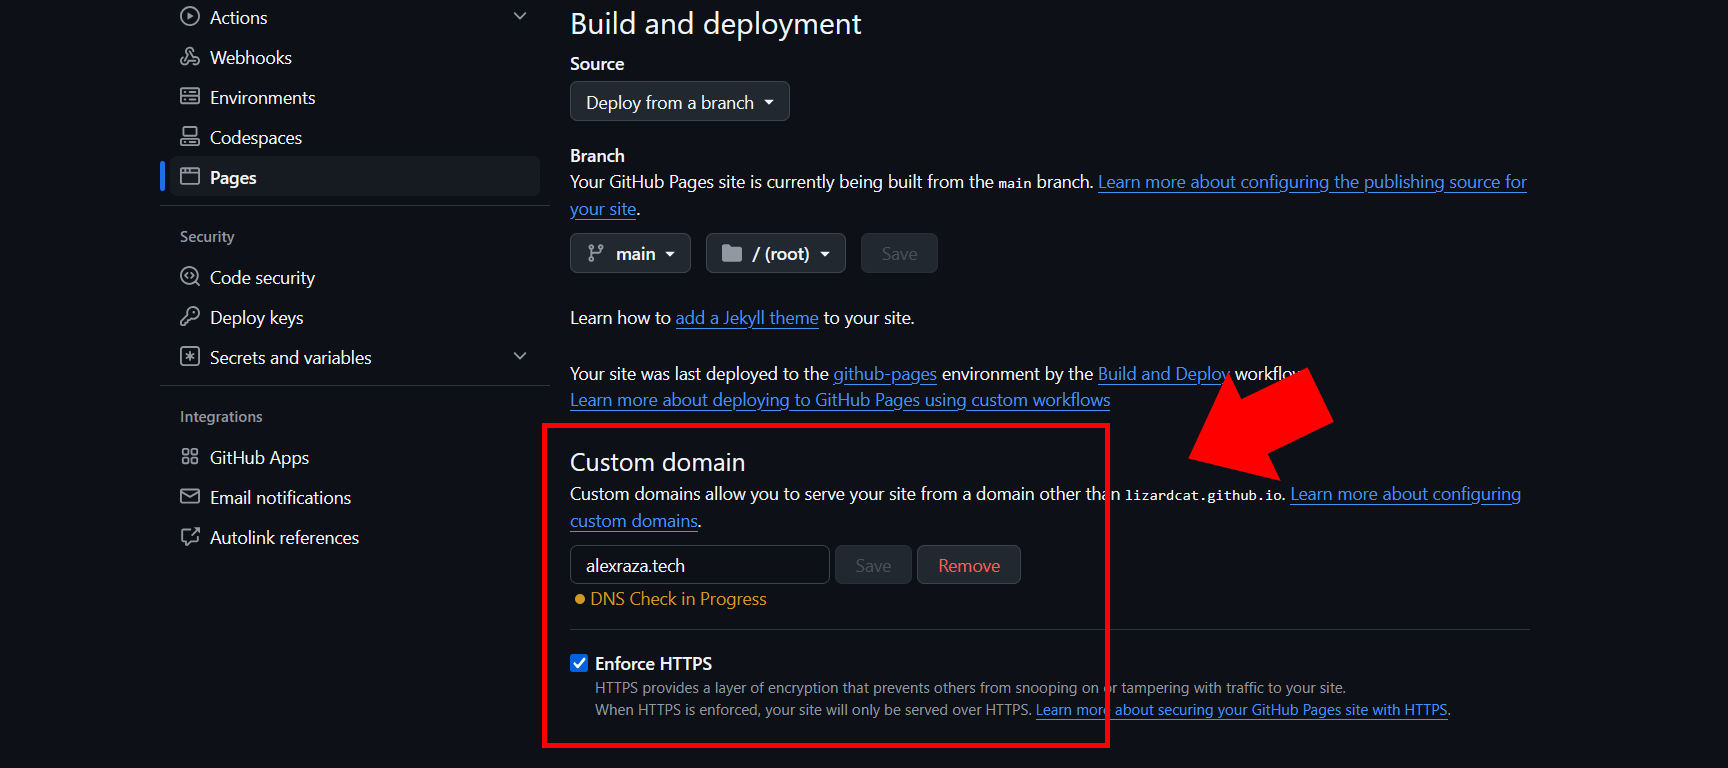
If the DNS check is successful, GitHub will recognize your custom domain. If you see an error, double-check your A and AAAA records in your domain settings and allow some time for DNS propagation.
Step 4: Verifying Your Domain in GitHub Pages
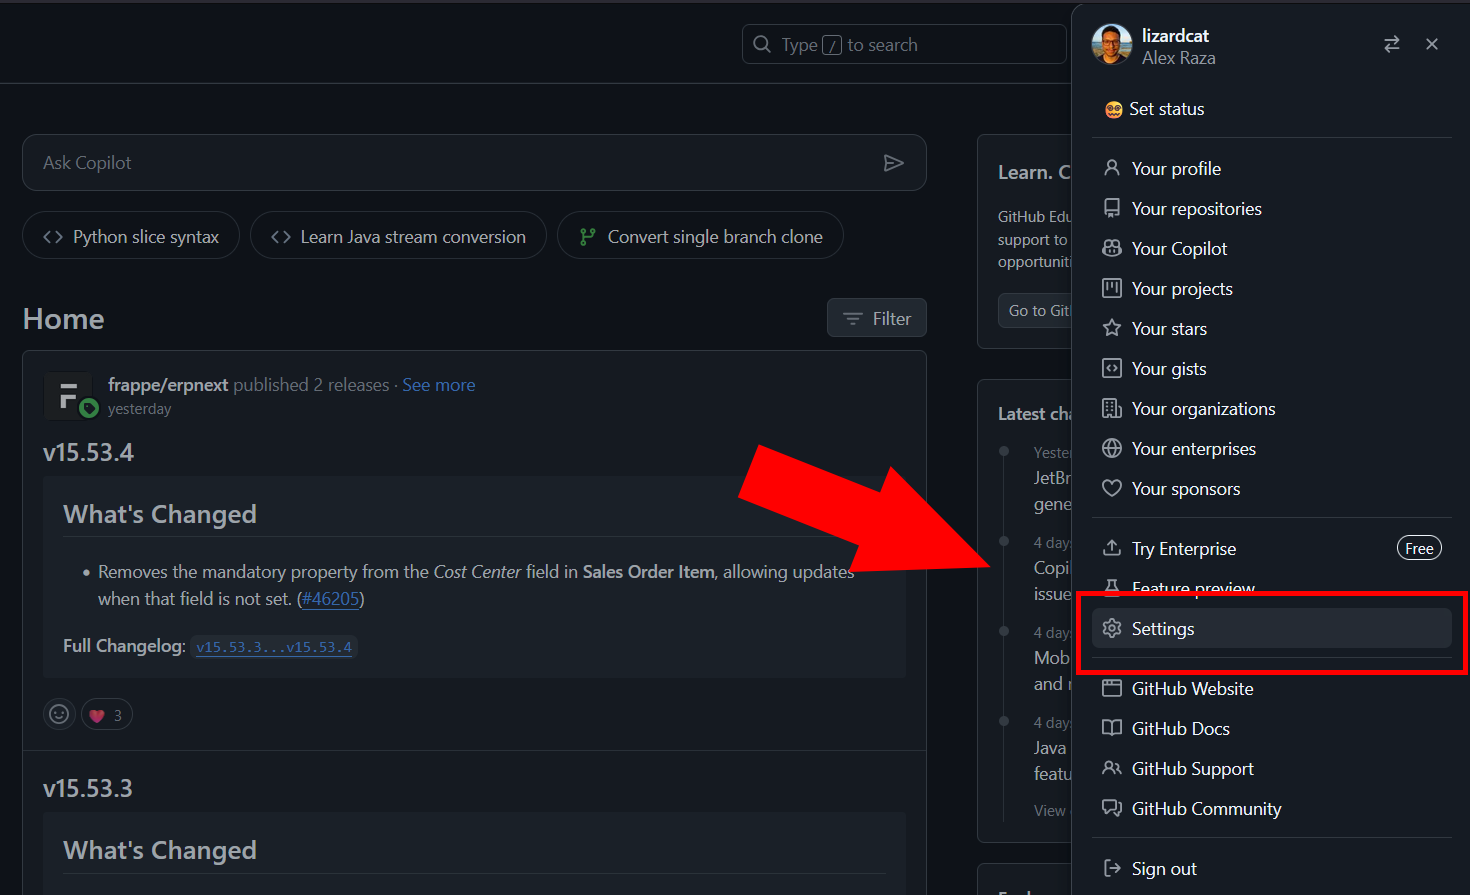
With your DNS records set, the last step is to verify ownership of the domain in your GitHub settings page.
Note: You don’t necessarily have to do this, but it is a recommended security measure to prevent domain takeover attacks. You can read up about it HERE.
- Go to your repository on GitHub.
- Navigate to Settings > Pages.
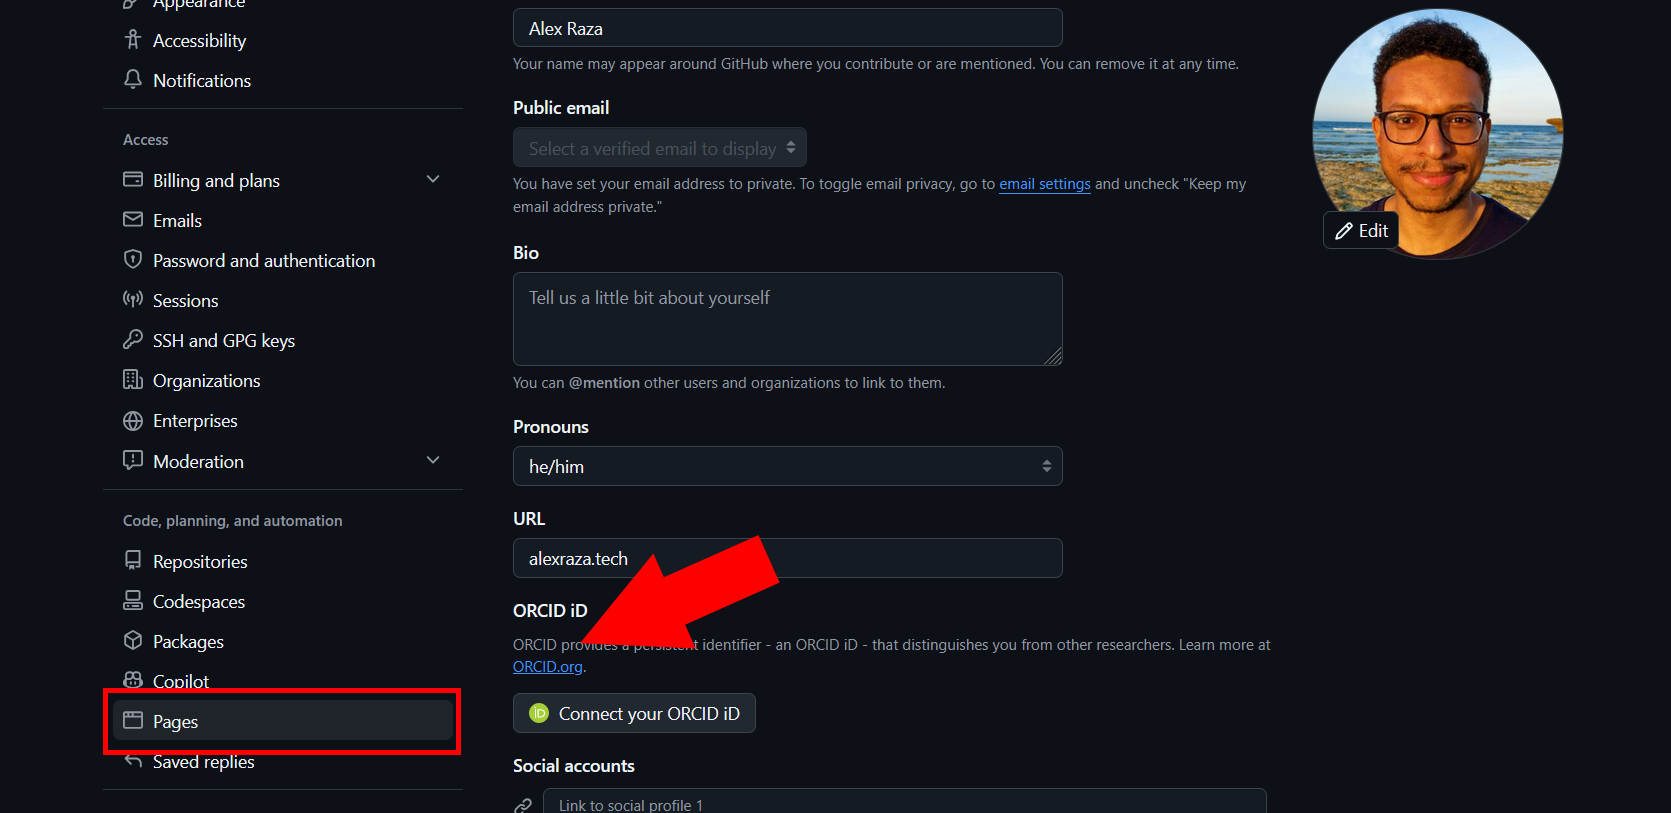
- Enter your
.techdomain and then click Add Domain (e.g.,yourdomain.tech).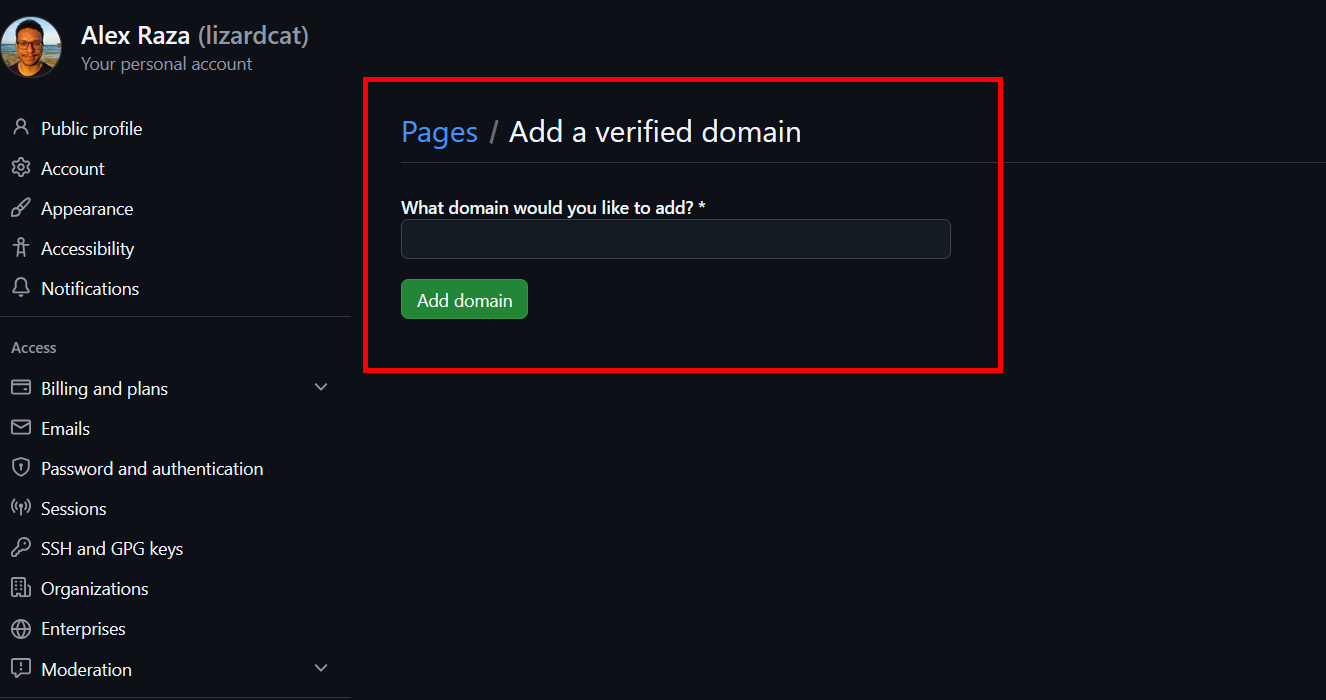
- GitHub will provide a TXT record that you need to add to your DNS settings (refer to step 2.4).
- Once added, return to GitHub and click Verify.
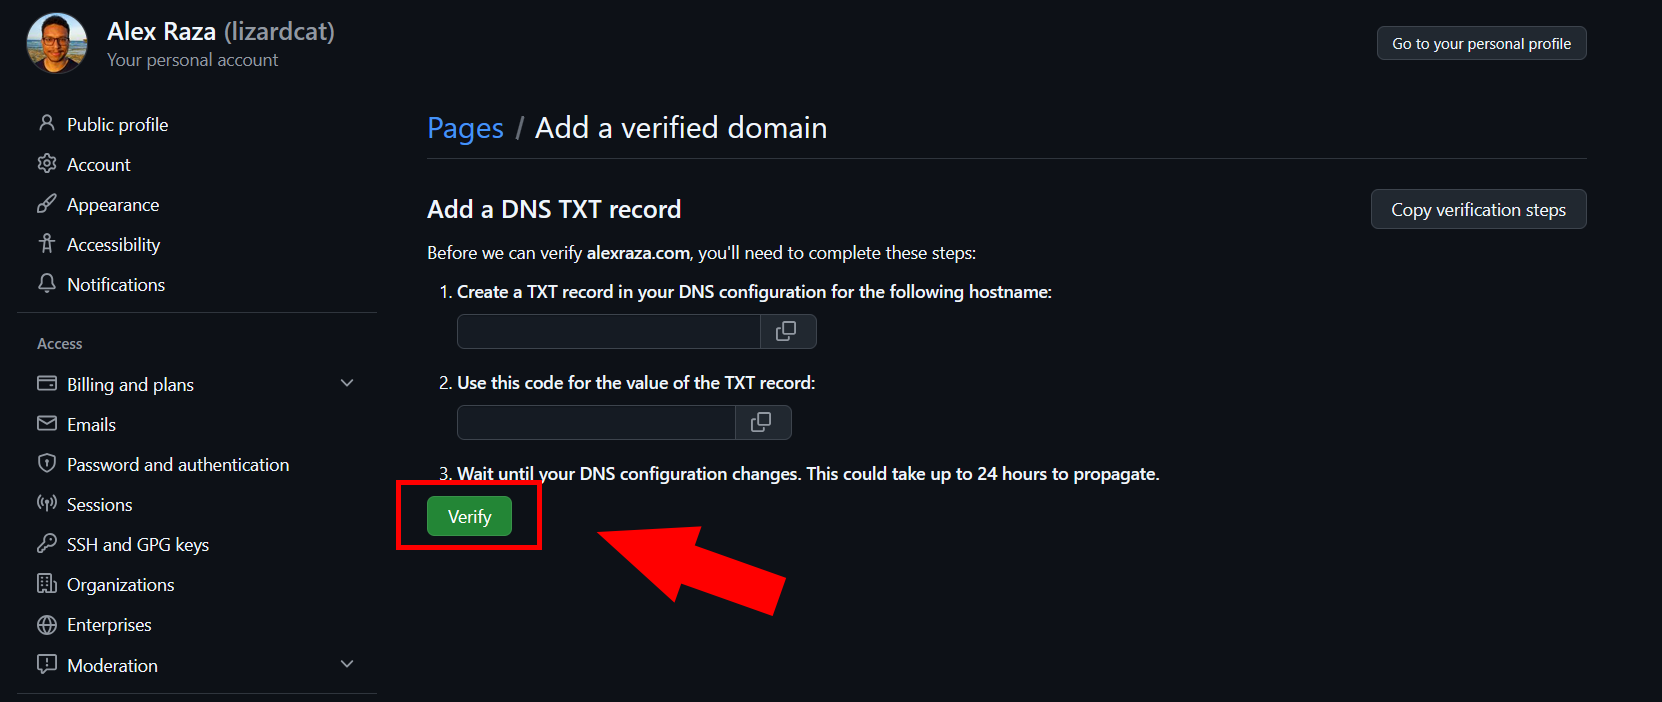
- If everything is correct, GitHub will verify you own the domain!
Step 5: Finally, Confirm Your Domain is Working
To confirm your domain setup is correct:
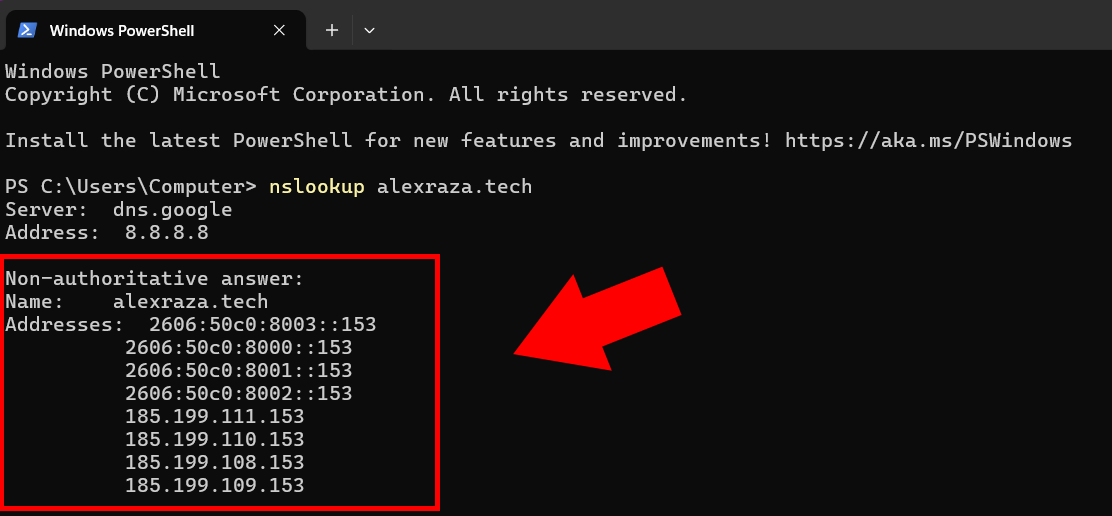
- Open a terminal or command prompt and run:
1
nslookup yourdomain.tech
or
1
dig yourdomain.tech
- You should see the IP addresses matching GitHub’s servers.
- Try visiting your domain in a browser. If it loads your GitHub Pages site, you’re all set!
Final Thoughts
And there you have it! You’ve successfully claimed a free .tech domain, configured it with GitHub Pages, verified it, and ensured it’s secured with HTTPS. Now you have a professional custom domain for your projects, completely free, thanks to the GitHub Student Developer Pack.