How to Set Up a Free VPS on Azure for Students: Create Your Own Secure Dev Environment
Azure offers students a fantastic opportunity: $100 in free credits and access to a powerful set of tools, including the ability to create virtual machines.
In this guide, I’ll go over how to turn your Azure student subscription into a full-fledged development environment. We’ll set up a free Ubuntu virtual machine (VPS) using Azure CLI, connect to it securely via your terminal using SSH, and install tools like VS Code Server for browser-based coding and Docker for containerized development.
What You’ll Need
- An Azure for Students account
- Azure CLI installed on your computer
- Bash/PowerShell for SSH
- Basic terminal knowledge (PowerShell, Bash, etc.)
Step 1: Create a Resource Group
Start by creating a resource group in a supported region near you. I’m in East Africa, so I picked southafricanorth:
1
az group create --name dev-vps-rg --location southafricanorth
This resource group will hold all your Azure resources like the virtual machine, network, and disk.
Note: Some regions like
eastusmay not have VM SKUs available to student accounts. If you get errors about unavailable SKUs, try somewhere less popular instead.
Step 2: Create the Virtual Machine (VPS)
Create a basic Ubuntu VM that we’ll use as a cloud development server:
1
2
3
4
5
6
7
az vm create \
  --resource-group dev-vps-rg \
  --name devVM \
  --image Ubuntu2204 \
  --admin-username azureuser \
  --location southafricanorth \
  --generate-ssh-keys
Switch out azureuser with your preferred username. Azure will automatically create a public IP and generate SSH keys for you. Make sure to note down the public IP address! You’ll need it to connect later. The SSH keys are created and stored at:
Private key: ~/.ssh/id_rsa
Public key: ~/.ssh/id_rsa.pub
Step 3: Open SSH Port
To connect to the VPS via SSH, you’ll need to allow port 22 through the firewall. Run this command:
1
2
3
4
az vm open-port \
  --resource-group dev-vps-rg \
  --name devVM \
  --port 22
Step 4: Connect via Terminal
Now that everything is set up, the next step is to attempt to connect to your VM using the public IP and SSH key. Run this:
1
ssh -i ~/.ssh/id_rsa azureuser@<your-vm-ip>
Replace <your-vm-ip> with the actual public IP of your VM. This will log you into the server where you can run updates, install packages, or launch code-server.
And voila! You’re in! Now that you’ve successfully SSH’d into your VPS, here are some commands to run to set up your dev environment:
1. Update and upgrade the system
1
sudo apt update && sudo apt upgrade -y
2. Install common dev tools (git, curl, build-essential, etc.)
1
sudo apt install git curl build-essential -y
3. (Optional) Install languages
1
sudo apt install python3-pip nodejs npm openjdk-17-jdk -y
Obviously you should install whatever language you are going to be working with. If that’s just Python and you have no interest in Node.js or Java, then just install python3-pip. This is your space, so feel free to personalize it as much as you like!
Step 5: Install VS Code Server
I love working on VS Code in my local environment, so it was a no-brainer to have it set up in my VPS. With this web version of VS Code, you can access your IDE with your preferred settings + all your code files from any browser in the world.
Run the following to get it set up:
1
curl -fsSL https://code-server.dev/install.sh | sh
Then run code-server:
1
code-server --bind-addr 0.0.0.0:8080
This binds the server to all network interfaces so you can access it from your browser outside the VM.
Step 6: Open Port 8080 for Browser Access
By default, Azure only opens port 22. To access VS Code in your browser, open port 8080 on your Azure VM using this command:
1
2
3
4
5
az vm open-port \
  --resource-group dev-vps-rg \
  --name devVM \
  --port 8080 \
  --priority 904
Next, visit http://<your-vm-ip>:8080 in your browser. If you didn’t save your IP address after step 2, just type this in your terminal (outside your Azure VM) to get it:
1
az vm show -d -g dev-vps-rg -n devVM --query publicIps -o tsv
The address you use should look something like this random IPV4 address: http://20.85.219.104:8080
Plug it into your browser and enter the password. If you’re unsure what your password is, check the terminal output after running code-server. If it’s not displayed there, you can find it inside the config.yaml file by running:
1
cat ~/.config/code-server/config.yaml
If all goes well, you should be redirected to a page that looks like this:
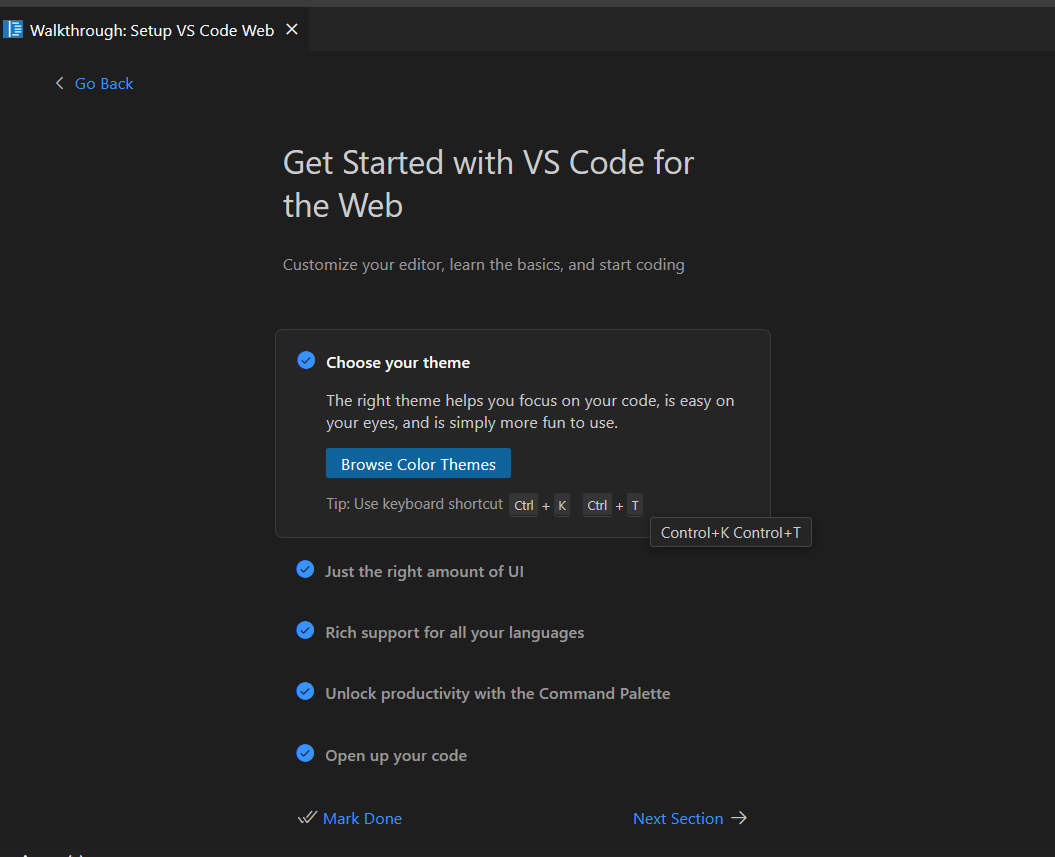
And that’s it! You now have a web version of VS Code you can access from anywhere and at any time. It’s pretty cool! If you have a local version of VS Code, save the contents of the settings.json file and paste it into this web version to transfer your preferred settings over. You should also install your preferred extensions.
Step 7: Install Docker
Finally, with your dev environment up and running, it’s time to install Docker. This is completely optional, but it is helpful to have it ready in your environment for containerized development. Run these commands:
1
2
3
4
curl -fsSL https://get.docker.com -o get-docker.sh
sudo sh get-docker.sh
sudo usermod -aG docker $USER
newgrp docker
Test Docker is working:
1
docker run hello-world
Final Thoughts
Congrats! You now have a cloud-based development environment you can access from anywhere using your browser! If you’ve made it this far, then you’ve set up:
- An Ubuntu VPS with SSH access
- VS Code Server for browser-based development
- Docker for containerized app development
This VPS gives you a powerful and flexible environment where you can learn backend frameworks, deploy APIs, install a private Git server, practice Linux administration, and much more, all for free with Azure for Students!